Long Exposure Intro
I was always fascinated by the images reaching the edge of the reality by showing something that is real as a matter of the situation or location but unrealistic in terms of time. When you speed up time just a little bit, you will see much more.
With the help of a sturdy tripod, timers and “fast” moving object in front of the camera, we can capture the magical image by sing slow shutter speed in full manual mode.
Timing is everything here!
Not just because of the weather and light conditions but also to eliminate unnecessary trouble. Eg if you want to capture the passing cars’s lights, do not go in the peak hour (wintertime). Why? Because you might get a nice sky closer to sunset, but in peak hour the traffic will not be on your side and cars will not move fast enough.
Also bear in mind the difference between first light and sunrise as well as when the sunset and the moment you do not have more light. Depending on your location and season it might be easy but can be challenging too!
To reach slower shutter speed, you will need most probably a sunglass to your camera. No, just kidding 🙂
However, it is true that you need to light going into your sensor, so instead of sunglass, a filter. Some plastic might do up to a certain point, but better to invest heavily to a decent pack of glass as soon as you can. Luckily, technology is on our side, so as the factories move on to even better layers, the old, but still good solutions are getting cheaper. (or at Xmas and Black Friday). So I would recommend to purchase a 3 or 6 or 10 stop filter. The higher the number the less light it transfers. Consider to include the filter holder and obviously to the right diameter to the lens you will use.
Which filter to buy? Depends on what you need as always in photography. The story therefore very complex, so I will show my examples I tried so far and briefly explain the situations and setting. In general, the faster your object moves, the less you need to reduce the shutter. It is not easy, so my advice is to count! If you want to shoot a car trail type of pictures arrive to the location earlier and figure out the rhythm of the traffic. Is it moving fast enough or too fast? Are there enough vehicle with strong lights to capture? How about traffic light and other light sources? On a river, check the same, too many vessels going in all direction might be good or very bad too!
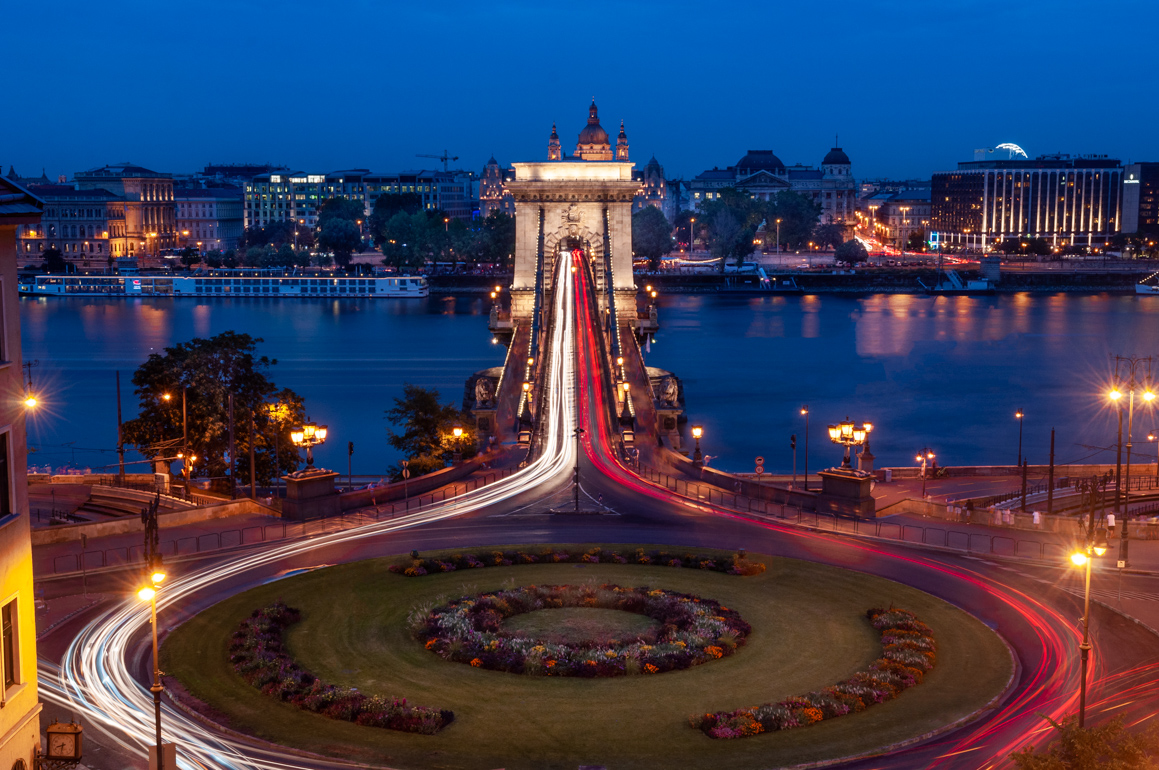
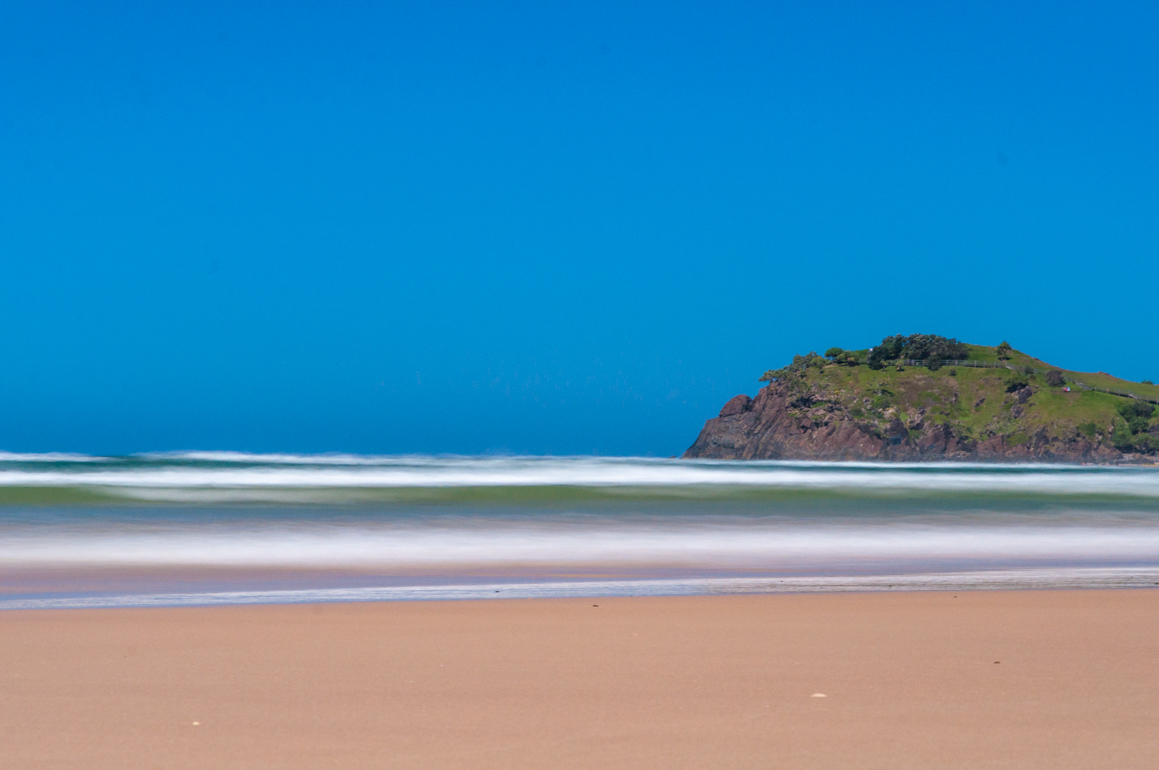
To give you an idea, waterfall is easy to shoot under 1/15 sec, river or waves to became smooth is like 2 seconds. I shoot fireworks with 3-5 seconds. Traffic might be somewhere 10+ seconds, while stars 30+ seconds (stars can be easily minutes too depending on the technic you apply).
ISO should be as low as possible to reduce the noise generated in the air and by the camera (small dots in the black area of the image. Try to shoot one with ISO 1200+ and zoom into the black areas)
The third thing to consider is the f number. Some people suggest to use as low as possible to pump thru as much light as possible to the camera sensor. I prefer at least 1-2 stops worse than the best your lens can do. Why? Lens tend to be more sharper there. So if your lens can do 2.8 or lower, than it is really good, but probably the sharpest image is around f4. Second reason for this is you will probably not need to care about depth of field. Blurry background is nice for portraits, but not for low light photography as per my opinion. I prefer razor sharp image in the corners too. Thirdly, the higher this f number is, the more starry the light sources are (especially for FX sensors, Full frame cameras). This is something I like on a cityscapes but some people think it is too fancy and destructive. Again try to shoot the same image of a light source (lightpost, lamp or something similar) 5 times with at least 2 f stops in between them and then zoom into the light source. Just try to avoid lens flare.
So as you can see, this is indeed a complex but rewarding thing.
Anyways, one thing is sure: Good preparation for location and timing as well as battery and card storage is essential.
Gear to bring: Tripod, camera, lens (cleaned), timer/remote control to eliminate any shake of the camera body. (it will not work if it is too windy like in the mountains or next to the Ocean)
Basic settings AFTER you fixed the focal length and focus with normal light and without filter:
-Shooting mode Manual
-Autofocus OFF
-Vibration Reduction OFF
-ISO as low as possible
-Long exposure compensation (menu) off
then check what would be the shutter speed now and decrease accordingly after you installed the filter (do not change the focal distance!).